Writing a Check with a Date: A Step-by-Step Guide
The Importance of Writing a Check with a Date
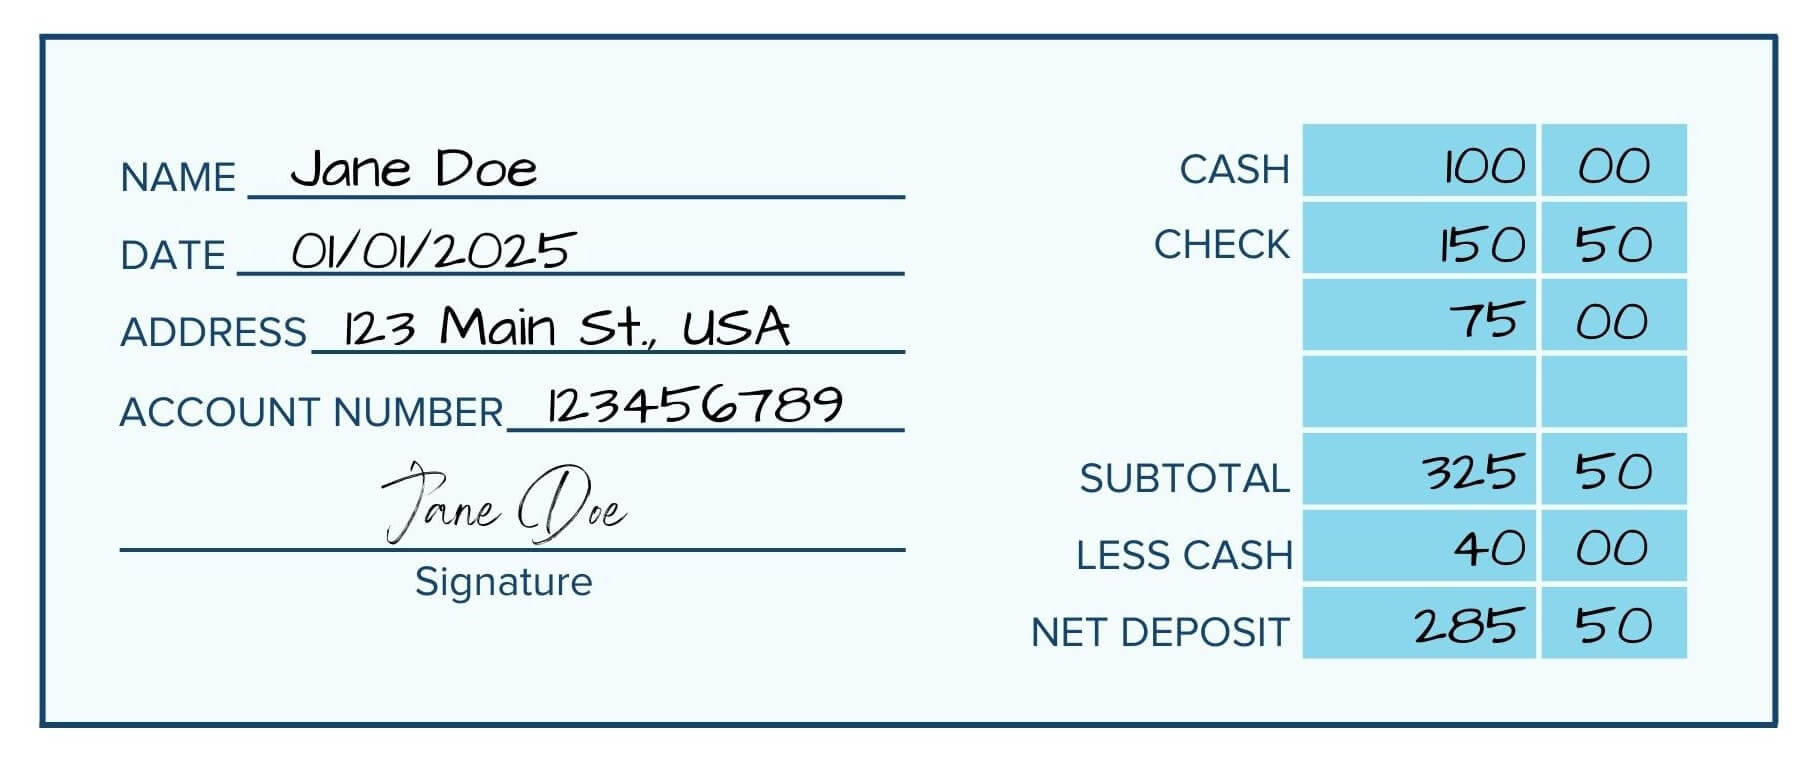
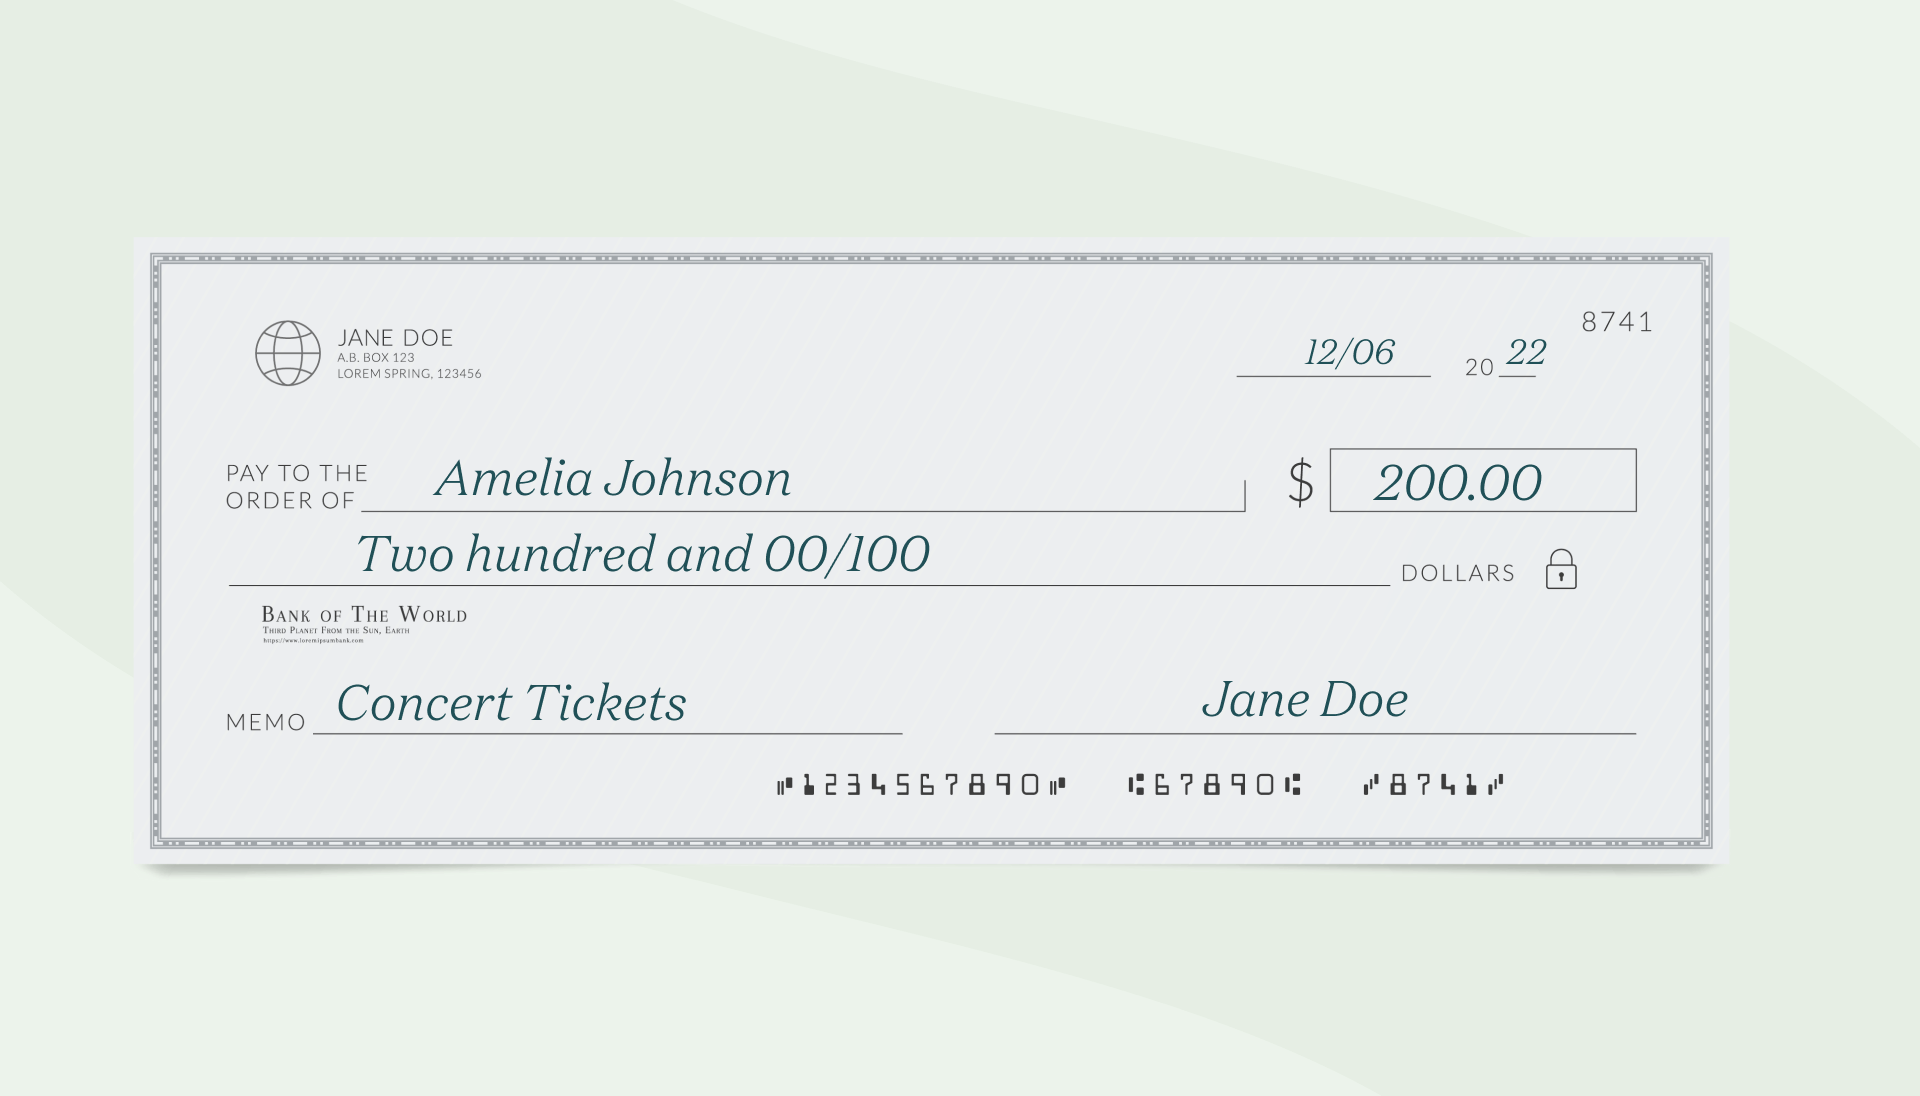
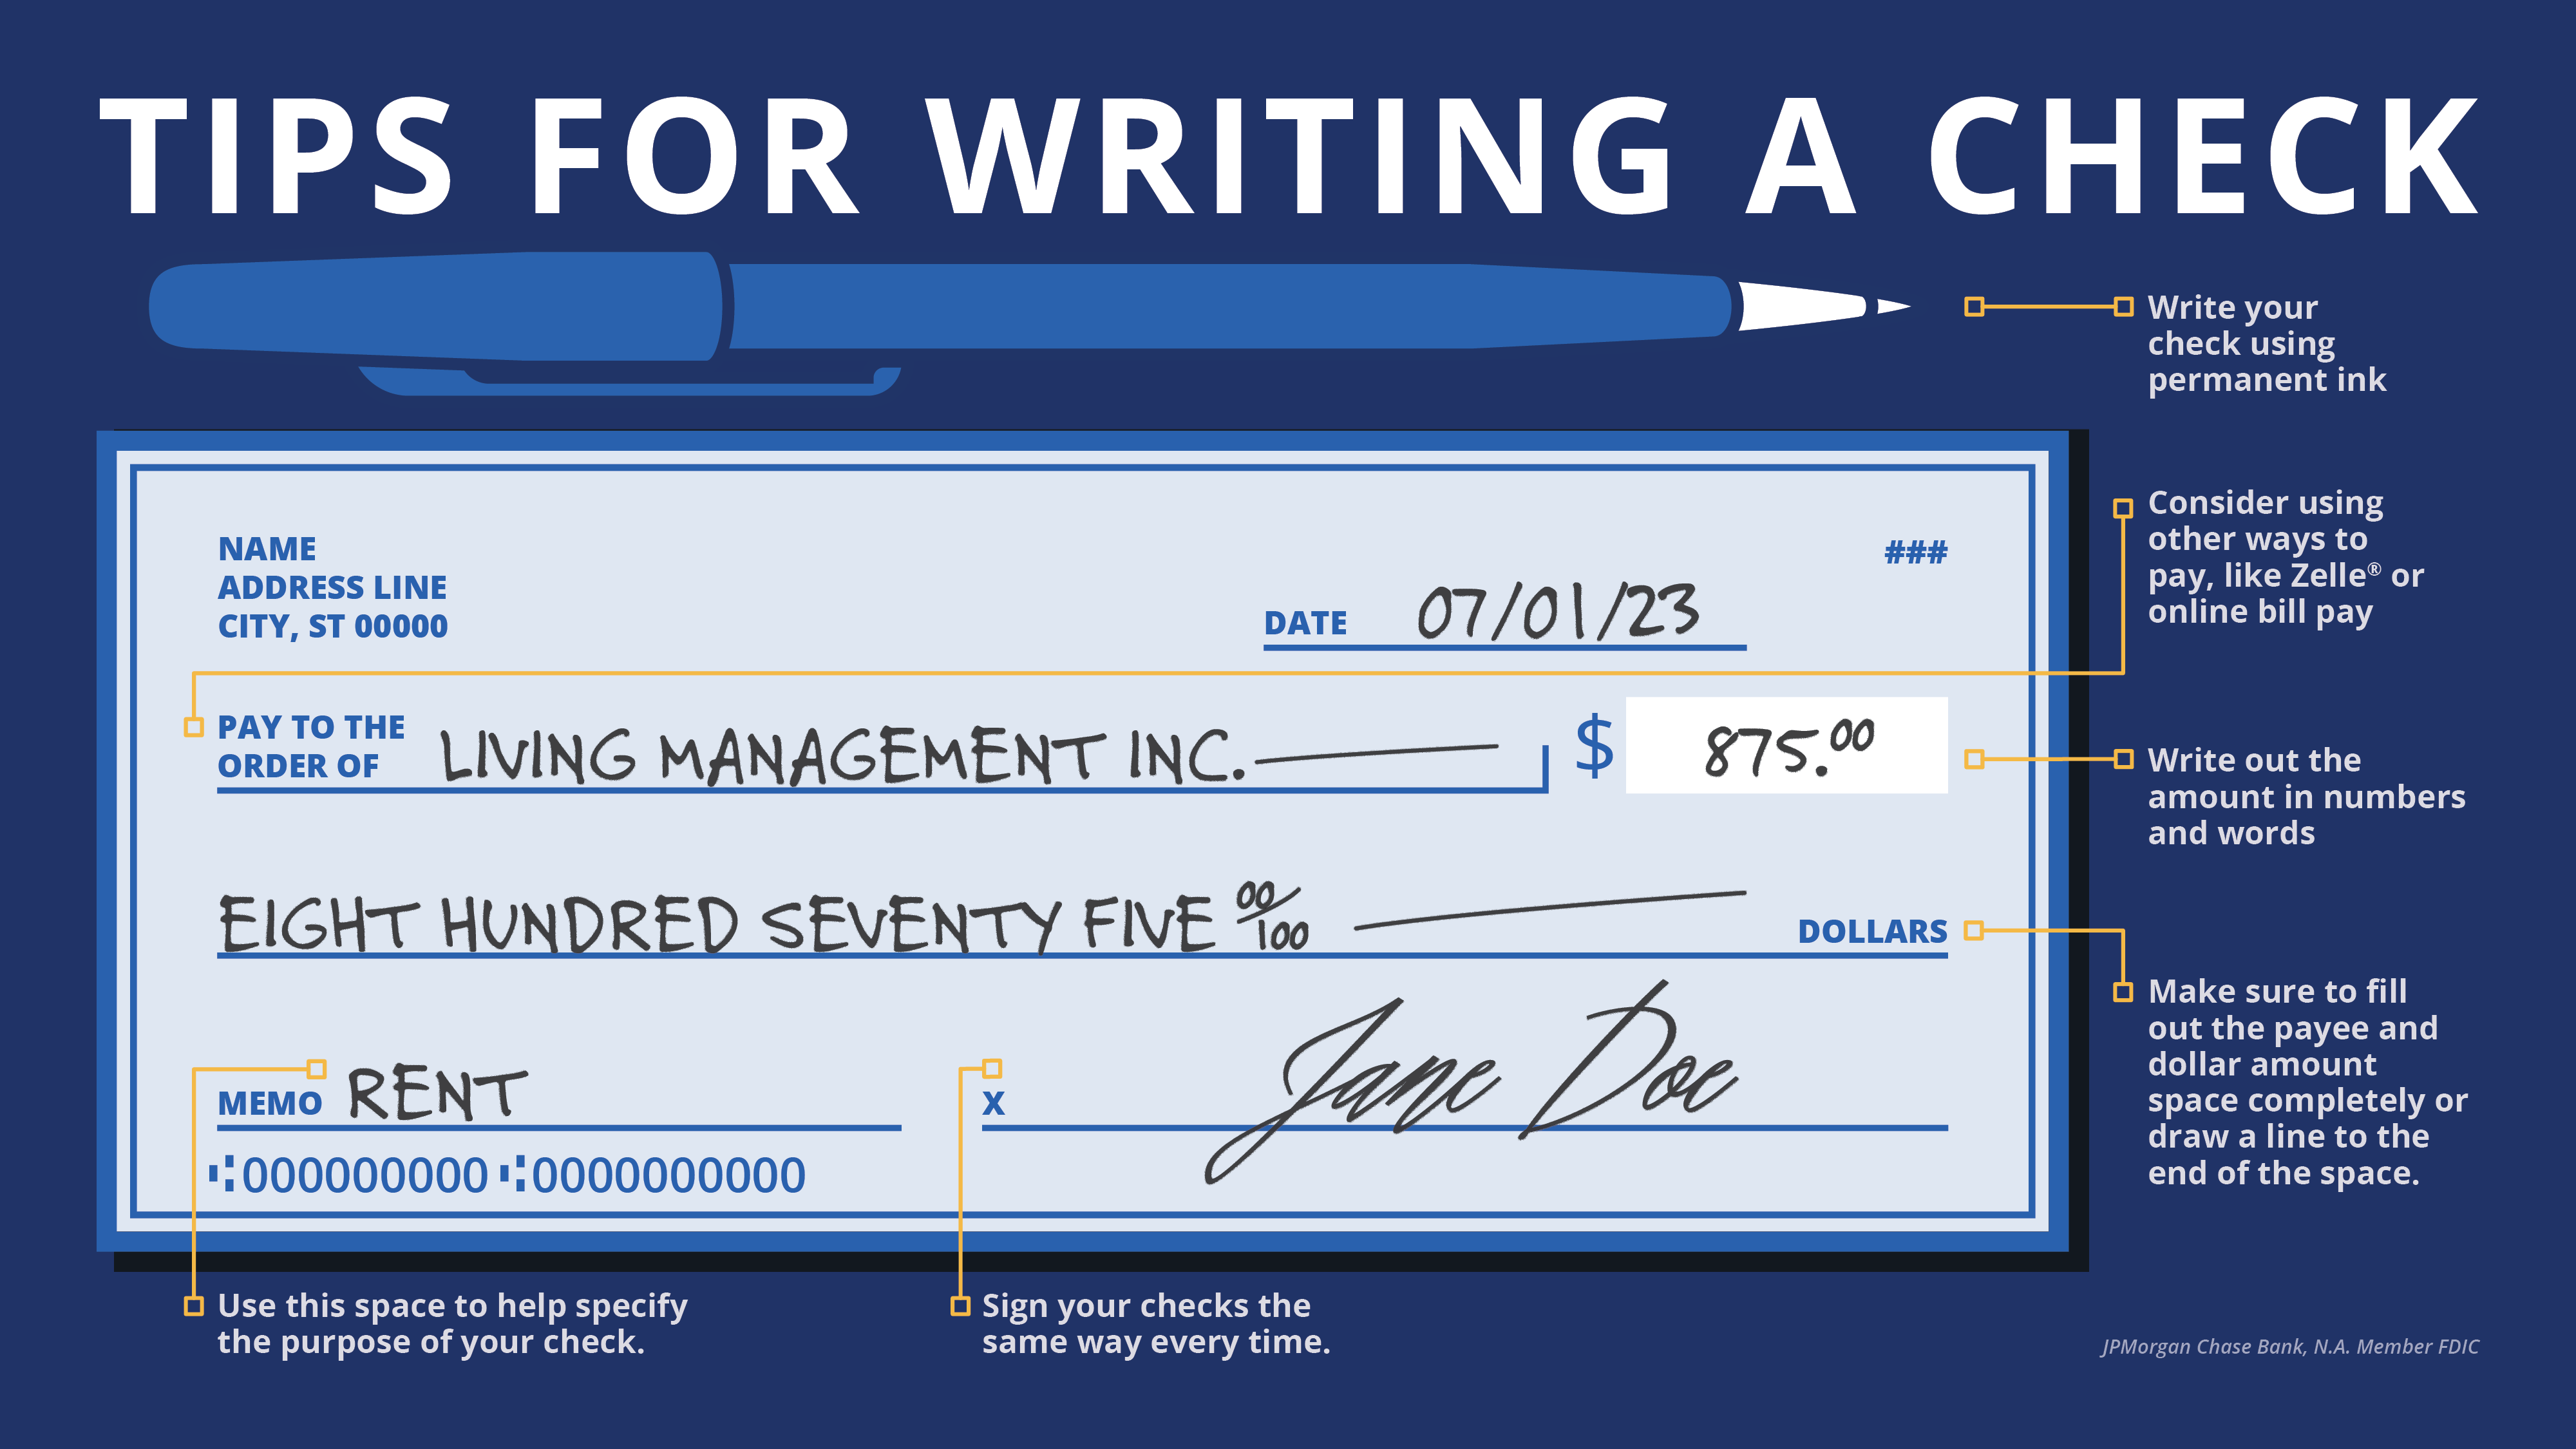
Writing a check is a common banking task that many of us perform regularly, but it's surprising how many people do it incorrectly. One of the essential elements of a check is the date, which is often overlooked or done incorrectly. In this article, we'll walk you through the process of writing a check with a date, ensuring your check is valid, secure, and processed correctly.Step 1: Date the Check
Step 2: Fill in the Payee's Name
Next, write the payee's name in the "Pay" field. This is the name of the person or business receiving the payment. Make sure to spell the name correctly to avoid any issues during processing.Step 3: Write the Numerical Amount
Step 5: Sign the Check
Sign the check on the bottom right-hand line, ensuring your signature matches the name written in the "Drawee's Signature" line. This is essential for the check to be processed correctly.Step 6: Add a Memo (Optional)
This particular example perfectly highlights why Writing A Check With A Date is so captivating.
You can also include a memo on the check to indicate the purpose of the payment. This is optional but can be helpful for record-keeping and organization.


 - wikiHow")


 Format (Example Plus Formatting Tips)")