Mastering the art of tying shoelaces doesn’t have to be complicated—especially if you’re a beginner. Many people get frustrated with tricky knots, but today, we’re sharing a clean, beginner-friendly approach that gets you laces tied quickly and securely. Whether you’re learning for the first time or helping a child, this quick shoelace tying tutorial will become your go-to method. Let’s dive in!
Why Quick Shoelace Tying Matters for Beginners
Tying shoelaces is a fundamental skill, yet it often stops travelers, parents, and even adults from feeling fully prepared. The key to confidence? Speed and reliability. A quick shoelace tying tutorial for beginners isn’t just about saving time—it’s about building a powerful habit that keeps shoes snug through long days, noisy recess runs, or busy commutes. With the right technique, you’ll avoid tight knots, slipping laces, and repeated tugging. Ready to master it? Here’s how.The Classic Effective Loop Knot: Your Secret Weapon

- Step 1: Create two loop foundations. Pull each lace through your fingers to form two identical loops—one left and one right.
- Step 2: Cross the loops over each other, forming an “X.” This helps align the laces for a tight knot.
- Step 3: Bring both loops through the center, tucking them under and tightening gently. Pull equally to avoid slipping.
- Step 4: Adjust the loops smoothly—too loose? Repeat the knot. Too tight? Loosen carefully until secure but comfortable.
Top Tips to Tie Shoelaces Like a Pro (Beginner Edition)

Such details provide a deeper understanding and appreciation for Quick Shoelace Tying Tutorial For Beginners.
To make this quick shoelace tying tutorial shine, here are actionable beginner tips:- Practice loops first: Before tying the top knot, spend 1-2 minutes just making neat loops—this reduces errors.
- Use consistent tension: Pull each step firmly but not aggressively to avoid puckered or sagging laces.
- Tie just before needing to secure: Keep your shoes slightly loose and re-tighten only when necessary to avoid tightness buildup.
- Master one knot at a time: Figure-eight, bunny ears, or loop-and-pull—each has its place. Pick your favorite and repeat.
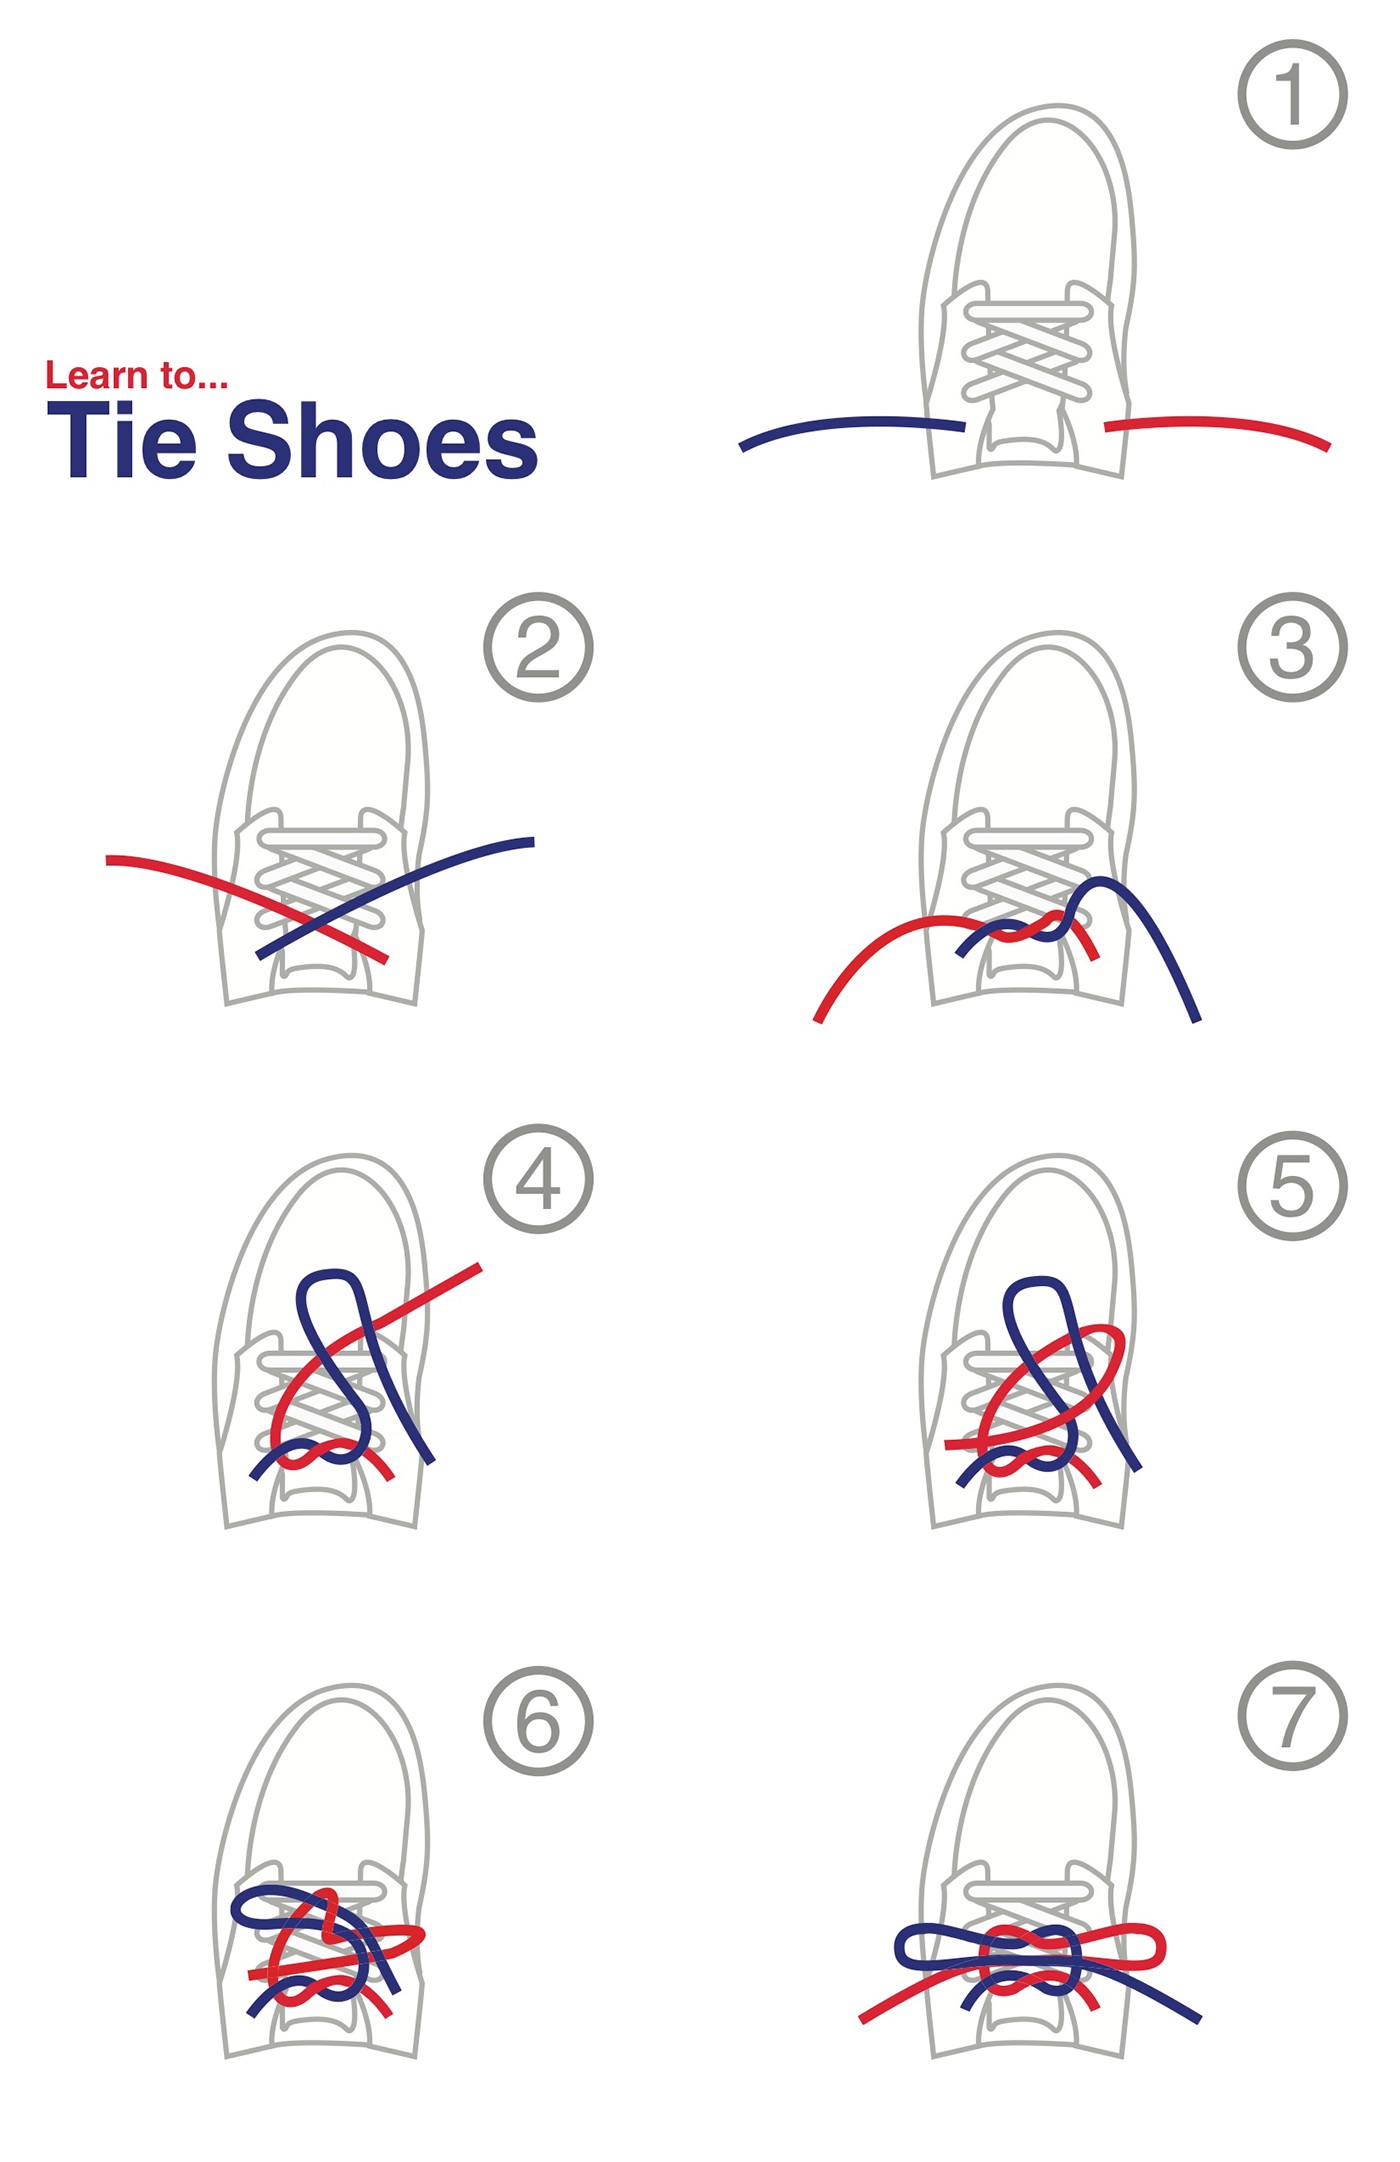
Furthermore, visual representations like the one above help us fully grasp the concept of Quick Shoelace Tying Tutorial For Beginners.
, for example, combines simplicity with steel-tight efficiency. Start by forming two loops, cross them, then use a small twist before pulling—this minimizes slipping and quickens the process. Perfect for sneakers or high-stress activities. Another hacks tip? When time is tight, try the “no-fuss pull.” After forming your two loops, instead of refined swooping, grip the laces firmly and jerk them tight—most slipages happen here anyway. Just be sure your hands stabilize the base each time.


 - wikiHow")


