Start a Minecraft Server on Windows
What Do You Need to Run a Minecraft Server?
A basic, un-modded Minecraft server can be run on any modern PC, and probably even the old computer that has been sitting in your closet diligently collecting dust. However, to run a Minecraft server, you'll need a Windows 10 desktop or server, at least 4GB of RAM, a reliable wired network connection, and a generous internet bandwidth plan. Minecraft can use up to 100MB per player per hour, so an unlimited bandwidth plan is ideal.
Step 1: Download the Minecraft Server JAR File
Next, you'll need to open the command prompt on your Windows computer. To do this, press the Windows key + R to open the Run dialog box, type in "cmd" and press Enter. This will open the command prompt.
In the command prompt, navigate to the directory where you saved the Minecraft server JAR file. To do this, type in the path to the directory, or navigate to it by typing "cd" followed by the path to the directory, and then press Enter.
Step 4: Run the Server Command

Moving forward, it's essential to keep these visual contexts in mind when discussing Start A Minecraft Server On Windows.
Once you're in the correct directory, type in the command to run the server. The command is "java -Xmx1024M -Xms1024M -jar "server.jar". This command tells the Java Runtime Environment (JRE) to allocate 1024MB of RAM to the server, with a maximum of 1024MB, and then runs the server.jar file. Press Enter to execute the command.
- Server Name: Set the name of your server.
- Game Mode: Set the game mode to survival, creative, or a custom game mode.
- Difficulty Level: Set the difficulty level of your server.
- Spawn Eggs: Set the number of spawn eggs.
- Spawn Protection: Set the protection level of the spawn area.
Once you've configured the server settings, you can launch the server by typing "java -jar server.jar" in the command prompt and pressing Enter. This will start the server, and you'll be able to connect to it using a Minecraft client.
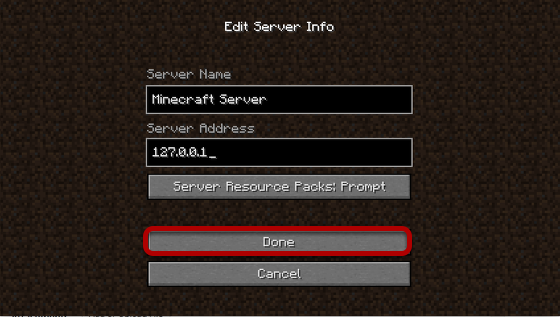
To connect to the server, open a Minecraft client and go to the multiplayer menu. Click on the "Add Server" button and enter the server IP address, which is the IP address of your server. You can find the server IP address in the server.properties file. If you're hosting the server on the same computer as you're playing on, you can use "localhost" instead of the server IP address.
Step 8: Test the Server
Conclusion
Starting a Minecraft server on Windows is a relatively straightforward process that requires a few basic steps and some knowledge of the command prompt. By following these steps, you'll be able to set up a Minecraft server on your Windows computer and connect to it using a Minecraft client.
If you don't want to deal with the hassle of setting up a Minecraft server on your own, you can use a third-party service like Nodecraft. Nodecraft is a Minecraft server hosting service that provides easy-to-use control panels and expert human support. With Nodecraft, you can start your Minecraft server in seconds.
Starting a Free Minecraft Server with Falix
Another option for creating a Minecraft server is to use a free hosting service like Falix. Falix provides 2.5GB of RAM, unlimited player slots, DDoS protection, and support for various game modes. With Falix, you can start your Minecraft server in under 60 seconds.
If you want to play Minecraft with your friends online, you can use the Minecraft Realms service. Minecraft Realms provides a cloud-based Minecraft server that allows you to play with your friends on any device. With Realms, you can start your Minecraft server for a monthly fee.
Resources
- Minecraft website: www.minecraft.net/en
- Minecraft forum: www.minecraft.net/en/community-forums
- Nodecraft: www.nodecraft.net
- Falix: www.falix.io
- Minecraft Realms: www.minecraft.net/en/minecraft-realms


![Image showcasing How to play Minecraft on LAN [TLauncher]](https://i.ytimg.com/vi/34YX-FX4Ywo/maxresdefault.jpg "How to play Minecraft on LAN [TLauncher]")